Amlot
7 easy tips to improve your website
Tune your website and make sure it looks good on Google, Facebook and Twitter.
What you’ll find on this page:
Introduction
Here are a few quick, easy and free improvements you can make to any website. It’s easy to forget some of these (I have), and over time, they don’t always get updated.
Many websites will promise you tips and tricks to improve your SEO performance and beat the Google algorithm. That’s not what this page is about.
Almost all of the recommendations here are basic HTML and have been around since the beginning of the web.
And yet I’ve seen major websites, even an advertising agency, forget to do at least one of these things.
Let’s get started.
1. Tweak your headline
This is the first and possibly most important change you can make to your website. The headline is the first thing visitors see when they reach your website. The headline doesn’t have to be the name of your company or organisation. It can be – and perhaps it should be – a short announcement of what you are offering.
It could be
- Free walks in Vienna
- Easy-to-use bookkeeping software
- Bird photography
But please avoid the buzzwords and jargon that fill so many websites, like:
- Solutions for dedicated professionals
- Enterprise-level communications
- Consultancy services for success
2. Tweak your tagline
Sure, Nike has a catchy tagline (Just Do It). But the reason we know it is not because it’s clever or witty, but because they spent millions of dollars advertising it.
Your tagline should make a promise to the reader that you’re actually able to keep. Try not to describe "the product" or worse, your company, but how the reader can profit from staying on your website and exploring your offering.
- We’ll take the stress out of moving home
- Our software will help you save time
- Discover rare photographs of eagles
Always remember that you should be able to deliver what you’re offering here.
Bonus nerdy grammar bit: There should always be a verb in your tagline (“take”, “help”, “discover”).
3. Tweak your title tags
The title tag is a text stored in the HTML of your content management system. When you create a new page (in WordPress, Squarespace, Wix, Webflow or any other website system), you’re asked to give the page a title.
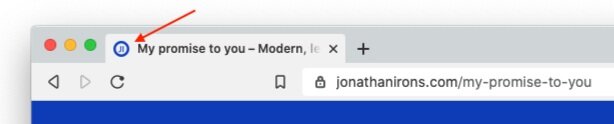
This is often the actual headline on the page (see above), but it can be anything you want it to be. It’s what shows up in the browser tab bar:

but it’s also the text that shows up in the search results, e.g. at Google:

(NB: Although the second part of my title here "My promise to you – Modern, lean marketing" is hidden in the browser tab, it does show up in Google. This is a compromise I was happy with).
You can write anything you want in the title tag, but once again, it should be a promise that you give to readers.
A title like mine above should lead to a page that actually delivers what the title says. So don’t give a page about pigeons a title that mentions eagles.
The general rule for Google and other search sites is that the title should not be longer than 70 characters, or it will be truncated. Look at other sites on Google to see what you think looks best.
4. Tweak your favicon
The favicon is the tiny icon that shows up in your browser tab bar, like this:
If you don’t set this icon deliberately, the browser will either show a generic "globe" icon like this:

or your content management system, e.g. WordPress, will display theirs, like this:

Have a look at your site settings, and you should find somewhere where you can set the favicon. Create an icon using a free tool like Faviconer.
- In WordPress the settings are under Administration > Appearance > Customize
- In Squarespace they’re under Design > Logo & Title > Browser Icon (Favicon)
- In Webflow they’re in Settings > General > Icons
5. Tweak your meta descriptions
The meta description is a short text in your HTML that is not displayed to your visitors, but other sites like search engines or social media can read and show it.
The best example is the text in the Google search result, like this:
The grey text beginning with "I promise to help you ..." is the meta description text.
Facebook shows the same link like this:

As you can see here, Facebook is truncating my text. Most Content Management Systems will only let you set one meta description, and my recommendation is that you tailor it to match the Google search results, i.e. a maximum length of 160 characters (Google did experiment with a longer 320 character meta description but soon changed it back, so if you see that somewhere on the web, it’s outdated now).
Be creative with your meta descriptions. Again here you can talk to your visitors directly. You don’t have to resort to buzzwords to describe your product. Start the promise right here.
All you’re really doing here is explaining what the visitor will see when they click the link.
6. Tweak your URLs
This one is a bit more nuanced, and it’s optional. OK, they're all optional, but this one even more so.
It might be a while since you set up your website, and you might have automatically set your URLs based on the title of your page. That’s fine in almost all cases, but have a look and check they’re OK.
If you still have
/new-page-004
flying around, you need to do some work.
For example, if your page title is "Let’s get started – Web Tweak Heaven", your content management system might have stored something like this:
/letsgetstartedwebtweakheaven
Some website builders, like the current version of WordPress, will replace the original spaces with hyphens, but it’s best to make sure, e.g.
/lets-get-started-web-tweak-heaven
It’s good practice to show the user what page they are on, and there is evidence that Google will reward a page that has a good match between headline, title tag, description, content and URL. A URL called "free-digital-cameras" that points to photos of eagles is not going to make a good impression on the algorithm.
The main thing here is to avoid URLs that look like "page-1312312481646". And there are a lot of pages like that around. Unless you’re running a news organisation or a very large e-commerce store, you probably don’t need those numbers (and even then you can combine them with some legible text).
NB: Speaking from experience, you might change the title of your page after you create it. Remember to go back and change the URL to match the new title.
Remember that if you do change an existing URL, you should create a 301 redirect from the old URL. Shopify for example does this automatically when you change an existing URL:

[A “301 redirect” tells Google and any other index that the old URL has been removed permanently and the new URL should be indexed. Google respects these redirects and will index your new URL very quickly.]
By the way, most web builders will also let you rename your URL categories. Your blog doesn’t have to be called “blog”. You can call it “journal”, “discovery”, “musings” or whatever you like. So you can have:
/mywebsite.com/my-journey/january-is-looking-good
7. Tweak your social share image
When you share a web address on Facebook, Twitter or any other social media sites, the page can show a preview of your page, with the headline, meta description and an image. You can usually set this image in your web builder or content management system.
The image just has to be online somewhere, and the address is stored in an HTML tag called og:image (og is for Open Graph).
In Webflow, the image is set in a parameter called “Open Graph Image URL”, where you just paste the URL of an existing image. In Squarespace it’s called “Social Image”. It may also be called “Social Share image” or something similar.
The best size to use for now (these things do change) is 1200 x 630 pixels, which works well on Facebook, Twitter and LinkedIn.
Here once again: be creative. You can just use a photo, like I do, or add a border or logo to your image. This is what I’ve gone with:

(By the way, did you know that in Facebook, once the preview has loaded, you can delete the web address from the post and write something else. Don’t write another web address though, as that will confuse Facebook. And if you’re explicitly asking people to read a page on your website, it’s cool to leave the link in the text itself as a call to action.)
Summary
These are just a few simple things that you can change on your website to improve how you’re seen around the web. It’s surprising how often these tweaks get forgotten though, but I understand that people are eager to publish and then get side-tracked with other tasks (I speak here from experience).
Take a few minutes to review your settings and make a few changes. I’m sure you’ll be happy with the results.